
Table of Contents
- Diagnose Your Zipper Problem First
- Tools You Need for Zipper Repair
- How to Fix a Zipper Slider That Won’t Move
- How to Unstick a Zipper with Graphite
- Fix Misaligned Teeth and Separated Zippers
- Replace a Broken Zipper Pull or Stopper
- When to Repair vs. Replace Your Zipper
- Conclusion
Last Updated: August 10, 2026
Diagnose Your Zipper Problem First
The first step in learning how to fix a broken zipper quickly is understanding exactly what’s wrong with it. Zippers fail in predictable ways, and identifying the specific problem determines which repair method will actually work. A slider that won’t budge requires a completely different approach than teeth that have separated or a pull that’s snapped off.
Before you reach for tools, spend a minute examining your zipper. Look at the zipper track to see if teeth are bent or missing. Check whether the slider moves at all or is completely frozen. Notice if the two sides of the zipper have drifted apart so they won’t fasten together. These observations take 30 seconds but save you from wasting time on the wrong fix.
Common zipper failures include stuck mechanisms caused by fabric snagging, misaligned teeth that prevent smooth operation, sliders that have lost their grip, separated zippers where the bottom stop is damaged, and broken pulls that make it impossible to move the slider. Each problem has a specific solution. Attempting a graphite fix on a mechanically bent slider, for example, won’t help because the issue isn’t friction, it’s deformation.
Before attempting any repair, test the zipper gently in both directions. This tells you whether it’s completely jammed or just stiff. A zipper that moves slightly is usually salvageable with basic tools. One that won’t move at all may need more aggressive intervention.
Tools You Need for Zipper Repair
You likely already own most of what you need to fix a broken zipper quickly. The best tools for zipper repair are simple, inexpensive, and often sitting in your junk drawer right now. Professional tailors keep these essentials on hand because they work reliably across different zipper types and materials.
Start with needle-nose pliers. These are your primary tool for most slider repairs. The narrow jaws let you grip the slider precisely without damaging surrounding fabric. Look for pliers with smooth jaws rather than serrated ones, serrated jaws can mar the metal slider.
Graphite is your next essential. A regular pencil works perfectly. The graphite acts as a dry lubricant that reduces friction without attracting dirt like oil-based products do. This is especially important for zippers on jackets, backpacks, and garments where you can’t wash out excess lubricant.
Bar soap serves as an alternative lubricant when graphite isn’t available. Rub it directly on the zipper teeth or slider. It’s gentler than commercial lubricants and won’t stain fabric.
Additional tools to have nearby include tweezers for removing fabric snags, a small screwdriver for adjusting stops if needed, and a needle and thread for emergency repairs. WD-40 works as a lubricant in a pinch, though it can attract dust and may stain certain fabrics, use it only on metal zippers on items you won’t wear immediately.
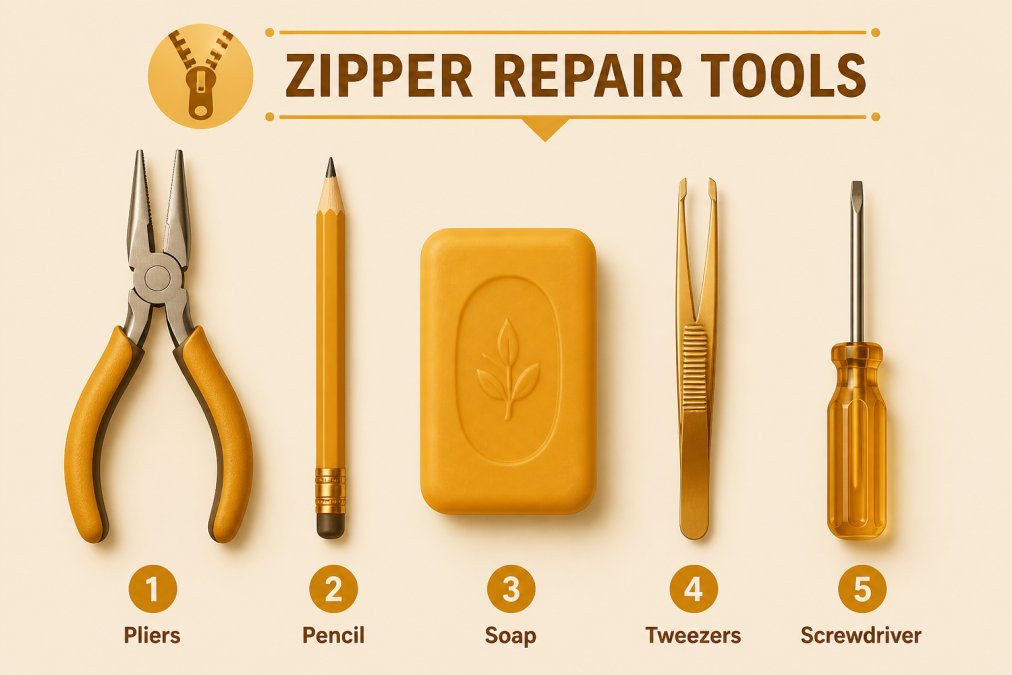
The most effective zipper repair toolkit costs under $15 and fits in a small bag. Graphite and pliers handle 80% of common problems.
How to Fix a Zipper Slider That Won’t Move
A stuck slider is the most common zipper problem, and it’s usually fixable in under five minutes. The slider won’t move because friction has increased, either from dirt buildup, dried lubricant, or the slider itself has worn and tightened on the teeth.
Start by examining the teeth on both sides of the slider. If you see dirt, lint, or fabric fibers caught in the mechanism, remove them with tweezers. This alone often solves the problem. Gently work the tweezers through the zipper track, pulling out any debris.
Next, apply graphite. Open your pencil’s tip over the stuck area and run it along both sides of the zipper teeth. The graphite particles settle into the mechanism and reduce friction. Close and open the slider gently several times to work the graphite in. You should feel the slider begin to move more freely.
If graphite doesn’t work, try bar soap. Rub it directly on the zipper teeth and slider. The soap acts as a lubricant without the mess of oil. Again, work the slider back and forth gently to distribute the lubricant.
For stubborn sliders, use needle-nose pliers to gently squeeze the slider from both sides. This slightly compresses the slider, increasing its grip on the teeth and often freeing stuck mechanisms. Apply only light pressure, you’re not trying to crush the slider, just adjust its tension slightly. After squeezing, test the slider. If it still won’t move, apply graphite and try again.
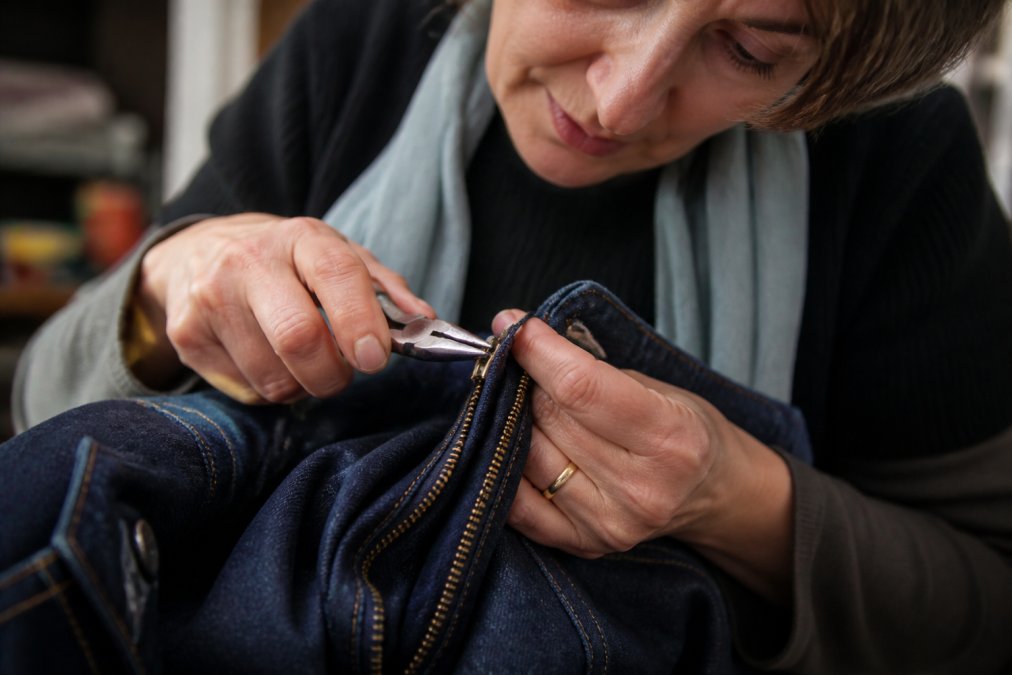
Never force a stuck slider. Forcing it risks bending the teeth or breaking the slider completely. Patience and the right lubricant solve most stuck zippers within a few minutes.
How to Unstick a Zipper with Graphite
Graphite is one of the most reliable ways to unstick a zipper because it addresses the root cause, friction between the slider and teeth. Unlike oil-based lubricants, graphite won’t attract dirt or stain fabric, making it ideal for garments you’ll wear soon after repair.
The process is straightforward. Take a regular pencil and sharpen it if needed. Position the pencil tip directly over the zipper teeth, working from top to bottom. As you move the pencil down, the graphite deposits onto the teeth and into the slider mechanism. You don’t need much, a light coating is more effective than heavy application.
After applying graphite, gently move the slider up and down several times. This distributes the graphite evenly through the mechanism. You’ll likely feel the slider move more smoothly almost immediately. If the zipper is still stiff, apply another light coat of graphite and repeat.
For zippers that are only slightly stuck, graphite alone often completes the repair. For severely stuck zippers, combine graphite with gentle plier adjustments. The graphite reduces friction while the pliers address any mechanical binding in the slider.
Never use graphite on plastic zippers, the graphite particles can embed in the plastic and become difficult to remove. For plastic zippers, use bar soap or commercial plastic-safe lubricants instead.
Fix Misaligned Teeth and Separated Zippers
Misaligned teeth occur when the two sides of the zipper drift apart so the slider can’t engage both sides simultaneously. This creates a gap where the zipper won’t fasten. Separated zippers are similar but more severe, the bottom stop has broken or loosened, allowing the slider to come completely off the track.
For minor misalignment, use needle-nose pliers to gently squeeze the slider from both sides. This increases tension and helps the slider re-engage both sides of teeth. Work slowly, testing the zipper after each adjustment. Small adjustments often restore proper alignment.
If the teeth themselves are visibly bent, you may be able to straighten them. Use the flat edge of a small screwdriver or the smooth jaw of pliers to gently tap bent teeth back into alignment. Work from the inside of the zipper where possible to avoid visible damage. This requires patience and a light touch, aggressive force will break the teeth completely.
For completely separated zippers, you’ll need to re-align the slider with the bottom stop. Locate where the slider should sit at the base of the zipper. Gently guide the slider back into position, ensuring both sides of teeth are properly seated. Once aligned, test the slider by moving it up a few inches to confirm it’s engaging both sides.
If the bottom stop is broken, the zipper may need replacement rather than repair. A damaged stop prevents the slider from holding its position, making the zipper unreliable.
Replace a Broken Zipper Pull or Stopper
A broken zipper pull, the handle you grip to move the slider, is one of the easiest zipper problems to fix yourself. The pull is separate from the slider mechanism, so replacing it doesn’t affect how the zipper functions.
First, remove what remains of the old pull. If it’s completely broken off, there may be nothing to remove. If part of it remains attached to the slider, carefully wiggle it free or use pliers to gently pry it loose.
Next, find a replacement pull. You can use a small key ring, a loop of cord, a leather tab, or a purpose-made zipper pull. The replacement needs to fit through the hole in the slider. Thread it through and secure it. For cord or leather, tie a knot large enough that it won’t slip back through the hole. For a key ring, simply thread it through and it will stay in place.
If you want a more permanent fix, you can sew the replacement pull in place. Thread a needle and pass it through the attachment point multiple times, creating a secure connection. This works especially well for fabric pulls or cord replacements.
For the stopper, the small piece that prevents the slider from coming off the top of the zipper, replacement is similar. If the stopper is loose or broken, it can usually be repositioned or replaced with a small piece of plastic or metal. In many cases, a few stitches through the zipper tape will hold a loose stopper in place.
Keep spare zipper pulls in your repair kit. They’re inexpensive and having one on hand means you can complete this repair instantly without hunting for a replacement.
When to Repair vs. Replace Your Zipper
Deciding whether to fix a broken zipper quickly or replace it entirely depends on the damage severity and the garment’s value. Some repairs are worth your time and effort. Others cost more in time than professional replacement would cost.
Repair the zipper if:
- The slider is stuck but mechanically sound
- The teeth are slightly misaligned but not bent or broken
- The pull is broken but the slider and teeth are fine
- The zipper is on a garment you wear frequently and replacement would be expensive
- The damage is minor and you have the tools on hand
Replace the zipper if:
- Multiple teeth are bent or broken
- The slider is cracked or severely damaged
- The bottom stop is broken and won’t hold the slider
- The entire zipper track is bent or warped
- The garment is valuable (like a wedding dress or tailored suit) and improper repair could cause additional damage
For high-value garments, professional replacement is usually the right choice. A poorly executed zipper replacement on a wedding dress or expensive jacket can damage the fabric and make the problem worse. Professional tailors have industrial equipment and experience with delicate materials that DIY repair can’t match. Services like Wedding Dress Alterations, Suit Tailoring, and Jeans / Pants Alterations all include expert zipper repair and replacement.
Cost matters too. If professional zipper replacement costs more than the garment’s value, DIY repair makes sense even if it’s imperfect. If the garment is expensive or irreplaceable, professional service protects your investment.
The time factor is real as well. Some repairs take 10 minutes. Others require multiple attempts and troubleshooting. If you’re in a hurry, professional replacement guarantees the problem is solved immediately.
Conclusion
Learning how to fix a broken zipper quickly puts you in control of a common problem that would otherwise require professional help. Most zipper failures respond to simple tools and techniques you can master in an afternoon. Graphite, needle-nose pliers, and patience solve the majority of stuck, misaligned, and stiff zippers.
For complex repairs or high-value garments, professional tailoring remains the best option. When your DIY repair isn’t working or when the garment is too valuable to risk, make an appointment online to have your zipper repaired by skilled professionals who understand fabric, precision, and the importance of getting it right the first time.
Frequently Asked Questions
How do you fix a broken zipper that has separated?
A separated zipper occurs when the teeth no longer mesh together. Start by inspecting the zipper track to ensure teeth are aligned. Use needle-nose pliers to gently squeeze the zipper slider on both sides, working gradually to re-engage the teeth. If teeth are bent or missing, you may need to replace the entire zipper. For garments like wedding dresses or suits, professional repair ensures the fabric and surrounding stitching remain intact.
What household items can help unstick a zipper?
Graphite pencil, bar soap, and paraffin wax are effective lubricants for stuck zippers. Rub a graphite pencil along the zipper teeth several times, then work the slider up and down gently. Bar soap applied to the zipper track reduces friction similarly. WD-40 also works but can stain fabric, so test on an inconspicuous area first. Avoid oil-based products that attract dirt and worsen jamming over time.
Can you fix a zipper with the pull part broken off?
Yes, a broken zipper pull is one of the easiest repairs. Replace it by threading a small loop of cord, ribbon, or a metal ring through the hole in the slider. Secure the loop with a knot or crimp. You can also purchase replacement zipper pulls online or at fabric stores. This quick fix restores function without replacing the entire zipper mechanism, making it ideal for everyday garments and urgent repairs.
When is it time to replace a zipper instead of repairing it?
Replace a zipper if multiple teeth are broken, the slider is severely damaged, or the track is bent beyond straightening. If a zipper repeatedly separates despite adjustment or has extensive fabric snags, replacement is more reliable than repair. For cherished garments like wedding dresses or formal suits, professional replacement ensures proper installation and preserves the garment's integrity. Calgary Seamstress specializes in zipper replacement for delicate fabrics.
This article was written using GrandRanker