Table of Contents
- Start by Identifying the Type and Extent of Fabric Damage
- How to Fix a Snag in Clothing Without Making It Worse
- How to Repair a Tear in Delicate Fabric Such as Chiffon, Mesh, and Silk
- How to Mend a Hole in a Jacket and Match the Lining
- How to Repair a Frayed Seam and Prevent Further Fraying
- Formalwear Repairs That Are Not Worth Attempting at Home
- Booking a Formalwear Repair Consultation in Calgary
- Frequently Asked Questions
Start by Identifying the Type and Extent of Fabric Damage
Before you pick up a needle, figure out exactly what you are dealing with, because knowing how to repair damaged formal wear fabrics starts with identifying the damage.
Look at the garment in good light. Lay it flat on a clean table.
- Snag: Loops of pulled threads on the surface. The fabric is still intact underneath.
- Tear: A split in the fabric, often along a line of weave. The edges can still meet.
- Hole: Missing fabric. The edges have pulled apart or burned away.
- Fraying: Loose threads along a seam or raw edge that keep unravelling.
Check the fabric type too. Silk, chiffon, and fine mesh tear easily and need gentler handling. Heavier wool and polyester can handle firmer stitches.
Measure the damage. A small hole is often easy to close at home. A suit tailoring specialist can assess structural damage like this before any repair begins.
How to Fix a Snag in Clothing Without Making It Worse
A snag is the most common formal wear problem, and it is also the easiest to make worse. Pulling on the loop drags more threads out of the fabric.
Follow these steps:
- Do not pull the loop. Leave it as it is.
- Push it back through. Use a blunt tool, such as a crochet hook or the eye of a sewing needle, to gently push the loop to the inside of the garment.
- Secure the back. Dab a tiny amount of fabric glue or clear fray stopper on the inside, just where the loop meets the fabric. Let it dry fully.
- Trim carefully. Snip any loose threads close to the surface with small scissors. Cut only what sticks out.
Some snags on fine fabrics will not lift flat. In that case, a light steam can relax the fibres. Keep the iron on low and use a pressing cloth.
Watch out: Never use a razor or a seam ripper on a snag. You can cut the surrounding fibres and turn a small pull into a hole.
How to Repair a Tear in Delicate Fabric Such as Chiffon, Mesh, and Silk
Delicate fabrics need patience, but they also need the right method for the specific cloth.
Silk and silk blends. Silk tears along the weave and frays quickly at the edges. Once the tear is secured, trim any loose threads carefully and fix frayed edges before they spread into the surrounding silk.
Satin. Satin shows every stitch and every press mark.
Chiffon and georgette. These are sheer, so any backing shows through.
Lace. Lace is a pattern, not a flat cloth, so a repair has to follow the motif.
Velvet. Velvet has a pile that shows every press and every stitch.
Wool suiting. Wool is more forgiving than silk but can shine if pressed too hard. A suit tailoring service can handle this kind of structural work.
Sequined and beaded fabrics. The embellishment is the weak point. Re-sewing around sequins or beads can snap threads and break the decoration.
Using Fusible and Iron-On Materials on Fine Fabric
Fusible tape can save time, but it does not suit every fabric. The adhesive can leave a stiff patch on chiffon and show through sheer silk.
Watch out: Never press fusible tape directly onto velvet pile, sequins, or beaded areas; the heat and adhesive can crush the pile or melt the embellishment, and the damage cannot be undone.
Each delicate fabric needs its own repair method, so match the technique to the cloth before you start sewing.
| Fabric | Recommended method | Key caution |
|---|---|---|
| Silk | Stabilize with organza, tiny running stitches | Avoid hot irons; press on low |
| Satin | Work from inside, stitches under 2 mm | Test fusible for shine first |
| Chiffon and georgette | Matching tulle or organza backing, 2-3 mm stitches | Keep fabric relaxed to avoid puckering |
| Mesh and net | Darn following the mesh pattern | Use a fine needle and matching thread |
| Lace | Trace the motif with tiny stitches | Use a specialist for complex lace |
| Velvet | Patch from inside in matching velvet | Never press pile; avoid fusible on the face |
| Wool suiting | Fine backstitch or small darn | Press through a damp cloth on low heat |
| Sequined and beaded | Work from the back with a fine needle | Avoid fusible near embellishments |
How to Mend a Hole in a Jacket and Match the Lining
A hole in a jacket often shows on the outside, but you can often repair it from the inside. If you would rather have a shop handle it, get a jacket rip fixed at a local clothing alterations shop.
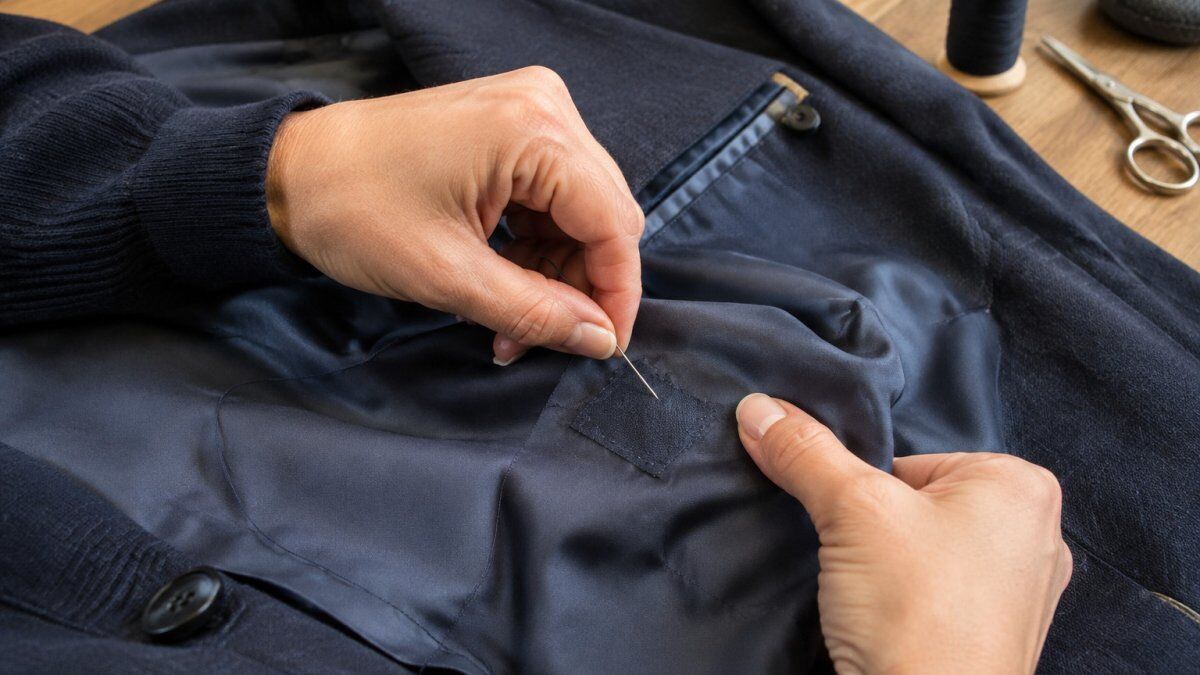
Here is a simple method:
- Cut a piece of matching fabric about 2 cm larger than the hole on every side.
- Pin the patch to the inside of the jacket, behind the hole, with the right side facing the outer fabric.
- Hand stitch around the edge with small, even stitches.
- Trim the excess patch to avoid bulk.
Matching the lining: If the lining is torn, choose a lining fabric with the same weight and sheen. Look for a store-bought lining in a similar colour.
Colour matters too. For a dark wool jacket, a navy or charcoal patch blends better than a bright cotton scrap. Test the colour against the lining in daylight before you sew.
How to Repair a Frayed Seam and Prevent Further Fraying
Frayed seams are a slow problem. One loose thread can unravel a whole seam if you ignore it. Stop the fraying early.
Here is what to do:
- Look for loose threads at the seam edge.
- Apply a thin line of seam sealant or clear fray stopper along the raw edge. Let it dry completely.
- Re-stitch the seam by hand with a backstitch, keeping the stitches close together.
- Press the seam flat on low heat with a pressing cloth.
For a seam that has come apart in several places, restitch the full length before you seal the edge. Sealant on loose threads will only trap them.
A common mistake is sealing a seam before it is sewn. Always fix the stitching first, then add the sealant.
Formalwear Repairs That Are Not Worth Attempting at Home
Some repairs are better left to a professional, and knowing when to step back is part of learning how to repair damaged formal wear fabrics well. Attempting them yourself can cost more than the original repair, and on formalwear the risk is higher because the construction, lining, and finish are what make the garment look right.
Use this feasibility check before you decide:
- Is the fabric weakened or shattered? If the cloth around the damage crumbles or pulls apart when you tug gently, a patch will not hold. Weakened fabric needs a specialist assessment, and sometimes the honest answer is that the garment cannot be repaired invisibly.
- Is the fabric heat-sensitive? Sequins, beading, some synthetics, and coated fabrics can melt or dull under an iron. If the repair needs heat, a professional with the right equipment is safer.
- Is the damage structural? Shoulder seams, armholes, lapels, and waistbands carry the fit of the garment. A repair there has to hold under movement, so a tailor should assess it.
- Is the damage on a visible panel? A repair on a flowing panel, a satin back, or a velvet face shows. Invisible repairs on visible areas are a specialist job.
- Is the garment lined or layered? Zipper replacement on a lined jacket or dress, and repairs that cross a lining, are tricky. A wrong move can damage the lining or the outer fabric.
Consider professional help for:
- Structural tailoring on suits: Shoulder seams, armholes, and lapels affect the whole fit.
- Leather garments: Holes and tears in leather need specialist tools and adhesives.
- Zipper replacement on lined garments: Removing a zipper from a lined jacket or dress is tricky. A wrong move can damage the lining or the outer fabric.
- Beaded, sequined, or embroidered panels: Re-sewing around embellishments can break the beads or snap the thread.
- Silk or chiffon gowns with complex construction: Hidden boning, layered panels, and delicate hems need careful handling.
Leather is a clear example. Repairing a damaged leather piece often starts with a professional assessment. A Calgary tailor can tell you whether a zipper or tear is a simple fix or a job for specialists.
Planning a Calgary Repair Around an Event Deadline
If the garment is needed for an event soon, plan backward from the date. A short consultation is the best first step, and it should happen before you buy any repair materials.
Ask these questions at the consultation:
- What repair method will you use, and will it be visible on the finished garment?
- How long will the repair take, and when should I bring the garment in?
Booking early gives time for the garment to be assessed and repaired without rushing. If the damage is structural or the fabric is heat-sensitive, ask for the assessment first and the quote second.
Pricing depends on the garment, the type of damage, and the amount of work involved.
Booking a Formalwear Repair Consultation in Calgary
If you decide a professional should handle the repair, a short consultation is the best first step. Bring the garment, the damaged area, and any photos of the problem.
Calgary Seamstress offers tailoring and alterations for formal and everyday garments. For suits and jackets, Canadian guidance on choosing a tailor and garment alteration services is a useful reference for what to expect from a tailoring service. Jackets and sweaters with everyday wear, such as a worn blouse or top alteration, can be assessed in the same visit.
To prepare for your consultation:
- Bring the full garment, not just the damaged part.
- Note the event date so the timing can be planned.
- Ask what the repair will look like on the finished garment.
- Ask about turnaround time and how the repair will be checked.
You can book a consultation online to talk through your repair with our team. For a useful background read on working with a Calgary tailor, our guide on getting alterations in Calgary walks through the process step by step.
Pricing depends on the garment, the type of damage, and the amount of work involved. Contact Calgary Seamstress directly for a current quote.
Frequently Asked Questions
How do you repair a small tear in delicate formalwear fabric?
Start by stopping the tear from spreading. Place a small piece of fine tulle or silk organza behind the tear, then use a fine needle and matching thread to stitch the edges together with small, even stitches. Work with a tight thread grid so the repair does not pucker. On very fine fabrics such as chiffon, hand stitching is usually safer than fusible tape, which can stiffen the cloth and leave a visible line. Test any adhesive on a hidden seam allowance first.
Can a snag in formalwear be repaired without cutting the thread?
Often, yes. Gently ease the pulled loop back to the wrong side using a blunt tool or a fine crochet hook, rather than cutting it. Keep the fabric flat and avoid tugging the surrounding threads. If the loop is tight or the fabric is delicate, leave it alone and have it checked by a professional, because cutting or forcing the loop can enlarge the damage.
How do you mend a hole in a lined jacket?
Work from the inside where possible. Cut a fabric piece slightly larger than the hole, tuck the edges under, and stitch it in place with a whipstitch or a fine running stitch. If the lining is also damaged, repair the outer shell first, then the lining, so the two layers do not catch on each other. Match the colour and weight of the fabric, and use thread that suits the garment’s material.
When should you take damaged formalwear to a professional tailor?
Take the garment to a professional when the damage is large, when the fabric is hard to identify, or when the item is expensive or sentimental. Tailors can assess whether a repair is feasible, advise on colour matching and invisible mending, and give you a quote and turnaround time before any work begins. Calgary Seamstress offers consultations, and you can book an appointment online at https://www.calgaryseamstress.com/booking/.
Damaged formal wear does not always need to be thrown out. With the right diagnosis, a careful hand stitch, and a clear sense of when to call a professional, most garments can look as good as new. Start with a close look at the damage, pick the method that fits the fabric, and get help when the repair goes beyond what you can do safely at home.