
Last Updated: November 3, 2026
Quick Summary
To learn how to repair school uniforms in Calgary, start with the small fixes: hand-sew torn seams along the old stitch line, patch holes from the inside, replace missing buttons, and hem pants with a 2 to 3 cm growth allowance. Keep a repair pouch with safety pins, fabric tape, and a threaded needle for school-morning emergencies.
- Keep stitches about 3 mm long and backstitch at both ends to lock a seam.
- Place a patch behind the tear so edges overlap at least 1 cm on every side.
- Leave a small gap under a replaced button so the fabric can sit flat.
- Fold hems with 2 to 3 cm of extra fabric so you can let them down later.
- Treat safety pins and fabric tape as same-day fixes and stitch properly that evening.
Table of Contents
- What You’ll Need Before You Start Repairing School Uniforms
- How to Sew a Torn Seam by Hand
- How to Patch a Hole in Uniform Pants
- How to Replace a School Uniform Button
- School Uniform Pants Hemming at Home
- Emergency Repair Hacks for School Mornings
- Repair or Replace? A Cost-Benefit Guide for Calgary Families
- When to Book Professional Uniform Alterations in Calgary
- Frequently Asked Questions
What You’ll Need Before You Start Repairing School Uniforms
Learning how to repair school uniforms in Calgary saves families real money and keeps good garments out of the landfill. Uniforms often only need a small fix. A loose seam or a missing button is a ten-minute job, not a reason to buy new.
Here is what to gather before you start:
- A hand-sewing needle pack with sharp and ball-point needles
- Thread that matches the uniform fabric, plus a spool of white and navy
- Small sharp scissors or snips
- Straight pins and a seam ripper
- Iron-on patch fabric and fusible web
- Spare buttons and a small snap kit
- A ruler, fabric marker, and iron
Before any repair, check the school’s uniform policy. Some schools require a specific crest, color, or cut. A patch that hides a logo may break the school dress code.
Parents often want a wider reference on sizing and durability.
How to Sew a Torn Seam by Hand
A torn seam is the easiest uniform repair to handle at home. Turn the garment inside out and match the original stitch line. Many uniform seams use a simple running stitch, so you can copy the original stitch line.
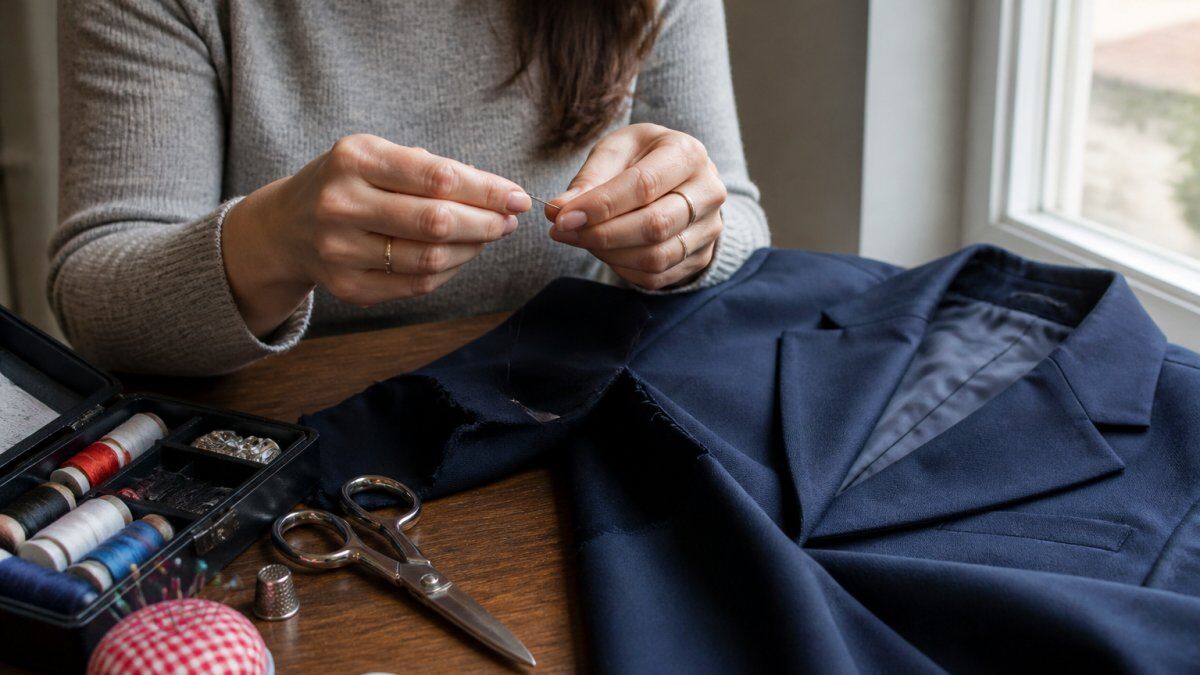
Step-by-Step Hand-Sewing Repair
- Turn the garment inside out and pin the torn edges together along the old stitch line.
- Thread your needle and knot the end. Match the thread color to the fabric.
- Push the needle through both layers, then back up in a small, even stitch.
- Keep stitches about 3 mm long and follow the original seam path.
- Backstitch at both ends to lock the seam so it does not pull open again.
- Press the seam flat with a warm iron.
Watch out: pulling the thread too tight puckers the fabric, and that pucker will not press out. Keep the tension light.
A common mistake is sewing only the visible gap. The seam usually fails further along, so stitch a few extra centimeters past each end.
How to Patch a Hole in Uniform Pants
Patching a hole in uniform pants is often easiest from the inside out. Cut a patch slightly larger than the hole, then place it behind the tear so the edges overlap by at least 1 cm on every side.
Choosing the Right Patch Method
- Iron-on patch: Fast and neat for small holes on cotton blends. Follow the package heat setting.
- Sewn patch: Stronger for knees and seats that take daily wear.
- Fusible web plus stitching: A middle path that holds the patch flat while you sew it down.
For dark navy and black pants, match the patch color closely. A visible patch on a school uniform draws attention and may conflict with the school dress code.
How to Replace a School Uniform Button
Replacing a school uniform button takes about five minutes and one needle. Thread a needle with doubled thread, then anchor it on the inside of the fabric behind the button spot.
- Push the needle up through the fabric where the button will sit.
- Pass through one buttonhole, then down through another.
- Repeat four to six times to build a secure shank.
- Wrap the thread around the stitches under the button two or three times.
- Push the needle to the inside and knot off.
Watch out: sewing the button too tight flattens the fabric and makes buttoning hard. Leave a small gap under the button for the fabric to sit.
If you would rather have it done professionally, contact us to book an appointment.
School Uniform Pants Hemming at Home
Hemming uniform pants at home is a matter of measuring twice and stitching once. Put the pants on your child with school shoes, then pin the hem at the length the school allows.
A growth allowance helps. Fold the hem so there is 2 to 3 cm of extra fabric inside. That lets you let the hem down later in the year as your child grows.
- Mark the hem with pins, then measure from the floor to keep it even.
- Press the fold before you sew.
- Use a blind hem stitch by hand so the stitches barely show.
- Check the finished length against the school dress code before you trim any fabric.
Never cut the excess fabric off right away. Keep it for the next growth spurt, and you will get another season out of the same pair.
Emergency Repair Hacks for School Mornings
School mornings do not wait for a sewing kit, and a torn seam on a blazer or a missing button on a cardigan can cause a rushed start to the day.
Here is how to handle the four failures that actually happen on a school morning, in the order they tend to happen:
- Torn seam on a blazer or sweater: Turn the garment inside out, line up the old stitch line, and pin it closed. If the gap is under about 5 cm, a safety pin through the inside of the seam holds it flat for the day. If it is longer, press fabric tape over the gap on the inside and smooth it with your thumb, body heat and a minute of pressure set it well enough for a school day.
- Missing button on a shirt or cardigan: A safety pin pushed through the buttonhole and back through the fabric behind it holds the placket closed without pulling. Do not use tape on a button placket, it leaves residue on the fabric and the buttonhole will not lie flat when you sew the button back on that evening.
- Loose hem on uniform pants: Fabric tape pressed along the inside of the fold will hold until you can stitch it. If the hem has already dropped and the pants are dragging, a row of safety pins spaced about 5 cm apart on the inside keeps the cuff off the floor and out of the slush.
- Stain on a sweater or shirt: Blot, do not rub, with a clean cloth, then treat with a stain pen before the stain sets. In cold weather, do not put a stained wool sweater in a hot dryer, heat sets protein stains permanently.
Zippers, seams, and buttons can fail more often when children begin layering and pulling harder in cold weather. Watch out: a safety pin used as a permanent fix will rust in the wash and leave a mark on light uniform shirts, so treat every morning hack as a same-day fix and stitch it properly that evening.
If the repair is beyond a pin, same-day professional options may be worth considering.
Repair or Replace? A Cost-Benefit Guide for Calgary Families
Repair usually wins for uniforms in good shape, but the decision is not really about the repair itself, it is about how many more months of wear the garment has left and whether the fix will survive the wash cycle. When a uniform includes wool, careful washing and drying can extend the life of wool pieces and help them stay wearable through another stretch of school days.
Use this guide to decide, working from the cheapest fix to the most expensive:
| Problem | Best Fix | Why | When to replace instead |
|---|---|---|---|
| Torn seam | Hand stitch | Fast, low cost, invisible | Fabric around the seam is thinning or fraying |
| Missing button | Replace button | Five-minute fix | The buttonhole itself is torn out |
| Small hole | Patch | Extends life by months | Hole is on a high-stress knee or seat and the patch will pull through |
| Hem too long | Hem with allowance | Handles growth | The fabric at the old hem line is already worn through |
| Fabric worn thin | Replace | Patch will not hold | , |
| Faded color | Replace | Cannot restore dye evenly | , |
A simple rule many Calgary families use: if the repair costs less than a third of the price of a replacement and the garment has at least one season of wear left, repair.
Fall and winter uniforms change the math.
Repairs also keep uniforms out of landfill, which matters to many Calgary families. The City of Calgary waste reduction guidance explains why textiles are worth repairing rather than tossing.
When to Book Professional Uniform Alterations in Calgary
Some jobs are worth handing to a pro. Bring the uniform in when the fabric is delicate, the tear is large, or the fit needs real changes. Zippers, lined jackets, and structured blazers are hard to fix by hand without leaving marks.
Book professional alterations when:
- The tear crosses a seam, pocket, or zipper
- The fabric is thin, coated, or stretchy
- The uniform needs resizing, not just repair
- You need it back fast for a school event
Calgary Seamstress offers one-hour and 24-hour rush service at our Southcentre Mall location. We handle jeans and pants alterations.
The Government of Canada consumer guidance on clothing care is a useful reference for fabric labels and care symbols before you decide.
Frequently Asked Questions
How do you repair a torn school uniform seam without a sewing machine?
A hand-sewn repair works well for most uniform seams. Turn the garment inside out, match the raw edges, and use a simple running stitch or backstitch with matching thread. Backstitch holds stronger for stress points like shoulders and armholes. Keep stitches small and even, and knot securely at both ends. For heavy fabrics like blazers, a backstitch every 3 to 4 mm gives a durable finish. If the fabric is frayed beyond the seam line, trim the loose threads first and consider a small patch behind the tear for reinforcement.
When should you take a school uniform to a tailor in Calgary instead of repairing it yourself?
Bring the uniform to a professional when the damage involves structured garments like blazers, lined pants, or anything with interfacing, or when a tear crosses a seam intersection. A tailor is also the better choice for school uniform pants hemming that needs to be invisible, or when you need growth allowance built in for a growing child. If the repair affects fit, such as taking in a waistband or shortening sleeves, professional alterations save time and prevent costly mistakes. Local tailors can also inspect seams for weak spots you might miss.
How can you make school uniforms last longer throughout the school year?
Wash uniforms inside out in cold water and air-dry when possible to reduce wear on seams and color. Check hems, buttons, and high-stress seams monthly and repair small issues before they grow. Rotate between two or three sets so each garment gets rest. For pants, a growth allowance in the hem lets you let them down as your child grows. Stain removal should happen promptly with a mild detergent, and avoid fabric softener on performance fabrics. These habits extend garment longevity and reduce replacement costs.
Can you patch a hole in uniform pants without it looking obvious?
Yes, an inside patch is the least visible method. Cut a patch from matching fabric or a repair kit, place it behind the hole, and sew around the edges with a small slip stitch or running stitch. For knees, a reinforced patch on the inside adds durability without changing the outside look. If the hole is on a seam, re-sewing the seam may be enough. For large or frayed holes, a tailor can match fabric and blend the repair. Always pre-wash the patch fabric to avoid shrinkage.
School uniforms take a beating, and the fixes add up fast when you know what you are doing. If a repair feels beyond a home sewing kit, Calgary Seamstress can help. We offer expert alterations, a one-hour or 24-hour rush service, and meticulous handling of zippers, cuffs, and hems, all from our Southcentre Mall studio. Get started with Calgary Seamstress and keep every uniform fitting and lasting longer.