Table of Contents
- What Poor Quality Garment Alterations Look Like
- Puckering and Tension Problems in Seams
- Crooked Hems and Uneven Stitching
- Raw Edges and Unfinished Seams
- How to Inspect Clothing Alterations Before You Leave
- Common Tailoring Mistakes to Avoid
- Post-Alteration Stress Testing and Pattern Alignment
- Conclusion
Last Updated: August 12, 2026
What Poor Quality Garment Alterations Look Like
When you pick up a garment from a tailor, the first instinct is relief. But relief shouldn’t be your final verdict. Poor quality garment alterations can undermine an otherwise perfect piece, and spotting the problems early matters.
The signs of poor quality garment alterations aren’t always obvious at first glance. Some defects hide until you wear the garment or move in certain ways. Others announce themselves immediately if you know where to look. Learning to inspect your alterations before you leave the tailor’s shop is the difference between wearing something confidently and discovering problems at home when it’s too late to fix them easily.
This guide walks you through the most common indicators of poor workmanship, what causes them, and how to catch them during your fitting appointment. We’ll cover everything from seam integrity to hem alignment, with practical steps you can take to ensure your garment meets professional standards.
Always inspect alterations in bright, natural light before leaving the shop. Fluorescent lighting in fitting rooms can hide puckering and tension problems that become obvious once you’re home.
Puckering and Tension Problems in Seams
Puckering is one of the most visible signs of poor quality garment alterations. It appears as bunching or gathering along a seam line, creating an uneven, rippled texture in the fabric. This happens when stitch tension is inconsistent or when the sewing machine isn’t properly calibrated for the fabric weight being used.
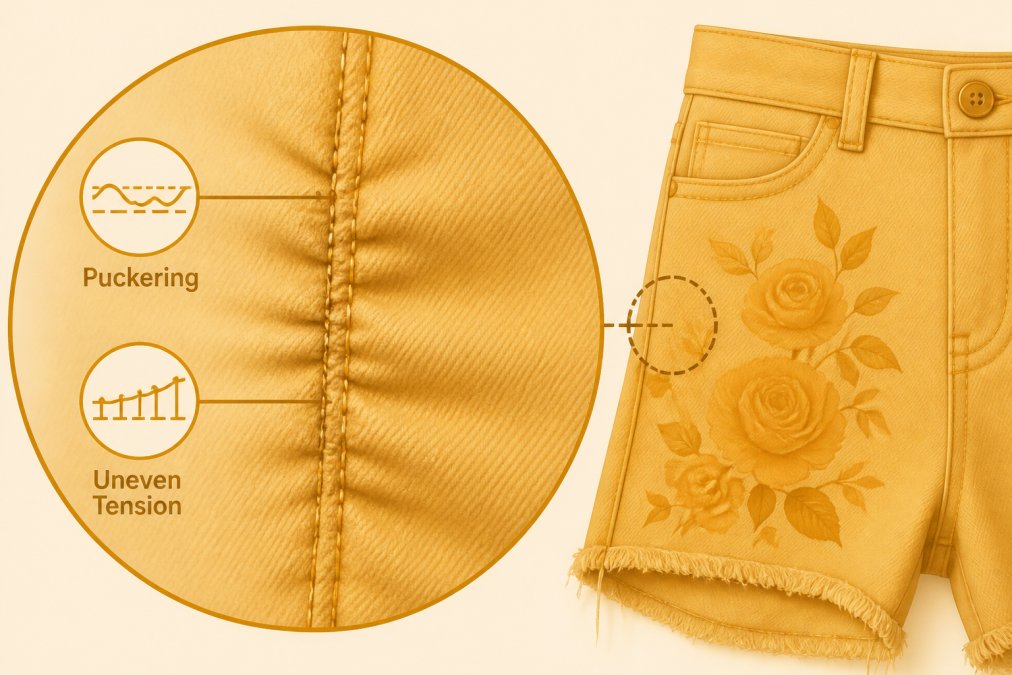
What causes puckering:
Tension problems arise when the upper thread tension doesn’t match the bobbin tension. A tailor working quickly might not test their machine settings on scrap fabric first, or they might fail to adjust settings when switching between different fabric weights. Lightweight silks, delicate cottons, and stretch fabrics are particularly vulnerable to tension issues because they require careful, precise settings.
When you inspect seams for puckering, run your finger along the line. A quality alteration should feel smooth. If the fabric bunches or the seam creates visible ridges, that’s a red flag. Look along the entire length of the seam, not just the visible sections. Puckering might appear only in certain areas, which suggests the tailor didn’t maintain consistent tension throughout the alteration.
The real problem with puckering isn’t just appearance. It weakens the seam structurally. The tension imbalance creates stress points where the fabric is more likely to fray or tear with regular wear. A garment that puckers at the seams will deteriorate faster than one with proper tension.
If you notice puckering in a seam, ask the tailor to re-do the work before you leave. Once you’ve paid and left, getting them to fix it becomes difficult. Catching it during the fitting appointment is your best protection.
Crooked Hems and Uneven Stitching
A crooked hem is immediately visible and impossible to ignore. This sign of poor quality garment alterations suggests either careless measuring or a lack of attention to detail. Hems should be parallel to the floor, creating a clean, even line all the way around the garment.
To check hem alignment, have the tailor pin the hem while you’re standing in proper posture. Walk around the fitting room. The hemline should stay consistent as you move. If it dips lower on one side or appears to slope, that’s uneven work. Some tailors rush through measuring and rely on a single measurement from one point, rather than checking multiple spots around the garment.
Uneven stitching within the hem itself is another problem. The stitch length should be consistent throughout. If stitches are longer in some sections and shorter in others, it indicates the tailor wasn’t paying close attention or was working too quickly. Inconsistent stitch length affects both appearance and durability. Longer stitches can separate more easily, and shorter stitches might pucker the fabric.
Look at the back of the hem too. Quality alterations show care on both sides. If the back looks rushed or sloppy, the front probably does as well. Run your hand along the inside of the hem. It should feel smooth and secure, not loose or bunched.
A properly hemmed garment has stitches that are consistent in length and spacing, creating a straight line that’s parallel to the floor. Anything less suggests workmanship that needs improvement.
Raw Edges and Unfinished Seams
Raw edges are fabric edges that haven’t been finished or sealed. When a tailor completes an alteration, they should finish the raw edges to prevent fraying and extend the garment’s lifespan. Leaving raw edges is a shortcut that reduces durability and indicates a lack of professional attention.
Check the inside of the garment carefully. Any seams that were altered should have finished edges. Common finishing methods include serging (using a serger machine to bind the edge), folding and stitching, or binding with bias tape. The specific method depends on the fabric type and the tailor’s preference, but some form of finishing should always be present.
Raw edges fray over time, especially with regular washing and wearing. The fraying weakens the seam structurally and can eventually cause the seam to separate. A garment with raw edges might look fine for a few wears, but it will deteriorate noticeably after several washes.
When inspecting for raw edges, look at seam allowances inside the garment. Turn it inside out and examine where the tailor made cuts or adjustments. If you see loose threads or unfinished fabric edges, that’s a sign of poor quality garment alterations. Professional work always includes proper edge finishing.
How to Inspect Clothing Alterations Before You Leave
The fitting appointment is your only chance to catch problems while the tailor can still fix them. A systematic inspection takes just a few minutes but saves you the frustration of discovering issues later.
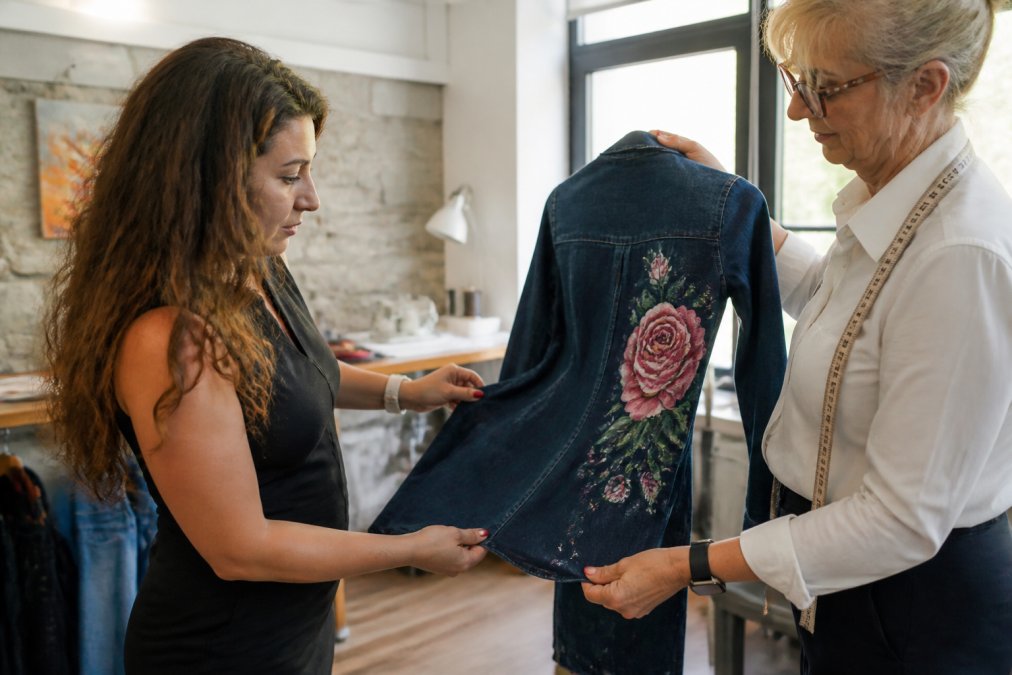
Step 1: Check the fit in proper posture
Stand naturally and move around the fitting room. The garment should feel comfortable without restriction. Walk, sit, and reach in all directions. If anything feels tight or pulls awkwardly, mention it now. A quality alteration accommodates movement without creating stress points.
Step 2: Examine seams under bright light
Ask the tailor to show you the seams they altered. Look for puckering, loose threads, or inconsistent stitching. Run your finger along each seam. It should feel smooth and secure. Check both the front and back of seams, especially on visible areas like shoulders and side seams.
Step 3: Inspect the hem carefully
Have the tailor check the hem length with you standing in proper shoes and posture. Walk around and confirm the hemline stays even. Look at the stitching closely. Stitches should be small, consistent, and secure. For dress hems, the stitching should be nearly invisible from the front.
Step 4: Look at edge finishing
Turn the garment inside out and check seam allowances. Look for raw, frayed edges. Finished edges should be clean and sealed. Ask the tailor what finishing method they used if you’re unsure.
Step 5: Assess overall workmanship
Step back and look at the garment as a whole. Does it look professional? Are there loose threads, uneven areas, or signs of rushed work? Trust your instinct. If something looks off, ask about it.
| Inspection Point | What to Look For | Red Flag |
|---|---|---|
| Seams | Smooth, consistent tension | Puckering, bunching, loose threads |
| Stitching | Even length and spacing | Inconsistent stitch length or gaps |
| Hem | Parallel to floor, even all around | Crooked, uneven, or sloping |
| Edges | Finished and sealed | Raw, frayed, or unfinished |
| Overall | Professional appearance | Rushed work, loose threads, visible defects |
Brides-to-be and anyone wearing formal attire should invest extra time in inspection. These garments are worn infrequently but need to be perfect. A professional fitting appointment includes this kind of detailed quality check.
Common Tailoring Mistakes to Avoid
Understanding common tailoring mistakes helps you recognize poor quality garment alterations when you see them. Many of these problems stem from rushing, inadequate training, or cutting corners to save time.
Ignoring fabric weight and type
Different fabrics require different approaches. A tailor who uses the same needle, thread, and tension settings for silk, denim, and stretch knit is making a fundamental mistake. Lightweight fabrics need finer needles and lighter tension. Heavy fabrics need stronger needles and heavier thread. Specialty fabrics like stretch or delicate silks need specific techniques.
Skipping the test stitch
Professional tailors always test their machine settings on scrap fabric before starting the actual alteration. This ensures tension is correct and the needle is appropriate for the fabric. A tailor who skips this step is gambling with your garment.
Making alterations too quickly
Quality work takes time. A tailor who rushes through fittings, measuring, or sewing is prioritizing speed over precision. Signs of rushed work include inconsistent stitching, incomplete edge finishing, and failure to address fit issues properly.
Not accounting for pattern matching
When altering garments with patterns, the tailor should maintain pattern alignment across seams. Stripes, plaids, and prints should line up properly. Ignoring pattern matching is a common sign of poor quality garment alterations, especially visible in jackets and patterned dresses.
Failing to press seams and hems
Pressing (using a steam iron or press) is essential after sewing. It sets the stitches, removes puckering, and creates a professional finish. A tailor who skips pressing leaves the garment looking homemade and unfinished.
Over-altering delicate or structured garments
Some garments, wedding dresses, tailored jackets, structured coats, have specific construction that shouldn’t be heavily modified. A tailor should understand which alterations work with the garment’s design and which compromise its integrity. Removing too much fabric from seams, changing dart placement significantly, or altering structured pieces can ruin the garment.
Post-Alteration Stress Testing and Pattern Alignment
After you’ve inspected the alterations visually, consider how the garment will perform under real-world conditions. This is especially important for pieces you’ll wear regularly or in demanding situations.
Stress testing during wear
Wear the garment for a few hours after the alteration, if possible. Move naturally, sit, bend, and reach. Pay attention to how seams feel. Do they pull? Do they feel secure? A quality alteration should feel invisible, you shouldn’t notice the stitching or seams working against you. If you feel tension or stress in certain areas, that suggests the tailor didn’t account for how you actually move in the garment.
Pattern alignment inspection
For garments with patterns, check that the tailor maintained alignment across all seams. Stripes should line up at side seams. Plaids should match at shoulders and hems. This requires careful planning and precise cutting, which is why pattern-matched alterations cost more. If the pattern doesn’t align, it’s a clear sign the tailor didn’t give the work proper attention.
Fabric drape assessment
After wearing the garment briefly, assess how the fabric drapes. Quality alterations maintain the garment’s original drape and silhouette. Poor alterations can change how fabric hangs, creating unflattering bunching or pulling. The garment should look intentional, not compromised.
Checking for delayed problems
Some issues don’t appear immediately. After a few wears and one wash, inspect the garment again. Look for seams that have started to separate, hems that are pulling loose, or areas where puckering has worsened. If problems emerge after just a few wears, the alteration work wasn’t adequate.
Conclusion
Recognizing signs of poor quality garment alterations protects your investment and ensures you’re wearing pieces that look and feel professional. The most common indicators, puckering, crooked hems, raw edges, and inconsistent stitching, are all visible during a careful inspection at the fitting appointment.
Professional alterations require skill, attention to detail, and respect for the garment’s construction. When you choose Calgary Seamstress for your alterations, you’re investing in meticulous craftsmanship. We handle each garment with care, finish edges properly, and ensure seams are structurally sound. Whether you need professional wedding dress alterations, suit adjustments, or everyday repairs, quality workmanship makes the difference.
Make an Appointment Online with Calgary Seamstress and experience the difference that professional attention to detail brings to your wardrobe.
Frequently Asked Questions
What are the most common signs of poor quality garment alterations?
The most telling signs include puckering along seams, crooked or uneven hems, raw or fraying edges, loose threads, and inconsistent stitch tension. Look for buttonholes that gape open, pattern misalignment, and seams that pull the fabric. If stitching appears wobbly or thread is bunching, the alteration quality is compromised. Run your hand along seams, they should feel smooth and lie flat against the fabric, not create bumps or ridges.
How can you tell if a hem was professionally finished?
A professional hem should be perfectly straight and level all the way around the garment. The stitching should be invisible from the outside or minimal and neat if visible. The hemline should hang evenly without dips or waves. The inside should show finished seams with no raw edges or fraying threads. Press the hem flat, it should lie smoothly without puckering. The stitches should be consistent in length and tension throughout, and the hem allowance should be appropriate for the fabric weight.
Can poor alterations ruin a garment permanently?
Yes, poor alterations can cause permanent damage depending on the severity. Broken seams, excessive puckering, or holes created during alteration may be difficult or impossible to repair without visible damage. Removing poorly done stitching can weaken the fabric or create stress marks. For delicate fabrics like silk or wedding dress materials, poor workmanship can affect the garment's drape and structural integrity permanently. This is why choosing a skilled tailor matters, mistakes made during alteration are often harder to fix than the original work.
What should I look for when picking up altered clothes from a tailor?
Before leaving, inspect seams for puckering, loose threads, and consistent stitch tension. Check that hems are level and straight by holding the garment up to a mirror. Look at buttonholes, they should be reinforced and not gaping. Examine fabric pulling, dart placement, and pattern matching, especially on plaids or stripes. Feel along seams to ensure they're smooth and finished. Try the garment on if possible to assess fit and comfort. Don't accept work with visible crooked stitching, raw edges, or loose threads. If you notice issues, ask the tailor to address them before you pay.
References:
[EXTERNAL_LINK: Alpha QC Apparel Quality Control Service for Canadian garment inspection standards | alpha-qc.com]
[EXTERNAL_LINK: Towa Bobbin Tension Gauge for consistent stitch quality in professional alterations | kawarthaquiltingandsewing.com]
[EXTERNAL_LINK: Carton Optical Canada inspection magnifiers for detailed fabric and seam examination | microscope.ca]
This article was written using GrandRanker